When training large image datasets, it is beneficial to have more than 1 GPU available, to spread the workload with distributed training and reduce the amount of training time. However, setting up an eGPU on Ubuntu pose many challenges.
This article aims to explain how I managed to setup a Sonnet Breakaway box with a spare GTX-1060 to work with the built-in GTX-1060 card, running on Ubuntu 18.04 with kernel 4.15.0-88-generic.
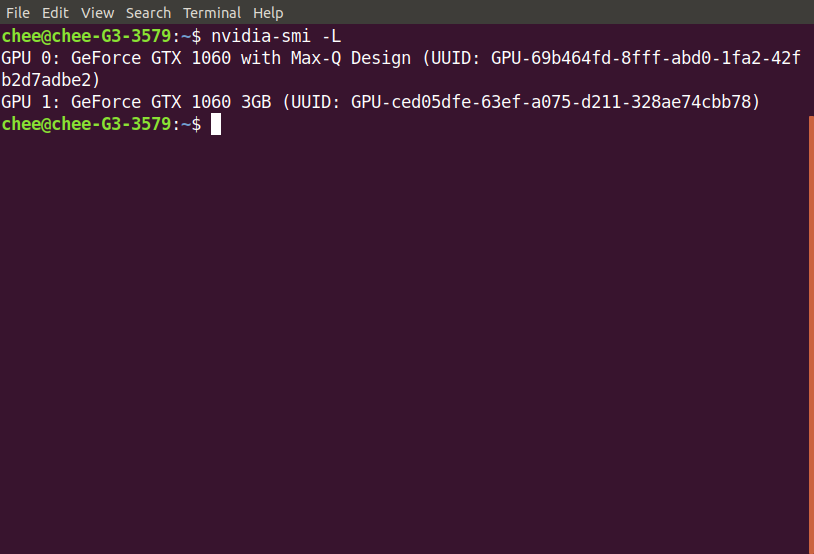
Before you can proceed, you need to have a working nvidia graphics card with the right drivers. Run nvidia-smi -L to ensure that it returns the current graphics card.
These are the steps I took:
Process
- Plugin and power the egpu box. Navigate to the
Settings > Devices > Thunderbolt, you should see the egpu box listed if its connected. Note that Ubuntu is able to perform authorization automatically. If all goes well, you should see the screenshot below:

For sanity check, you can also run the boltctl command and check that the egpu is connected.
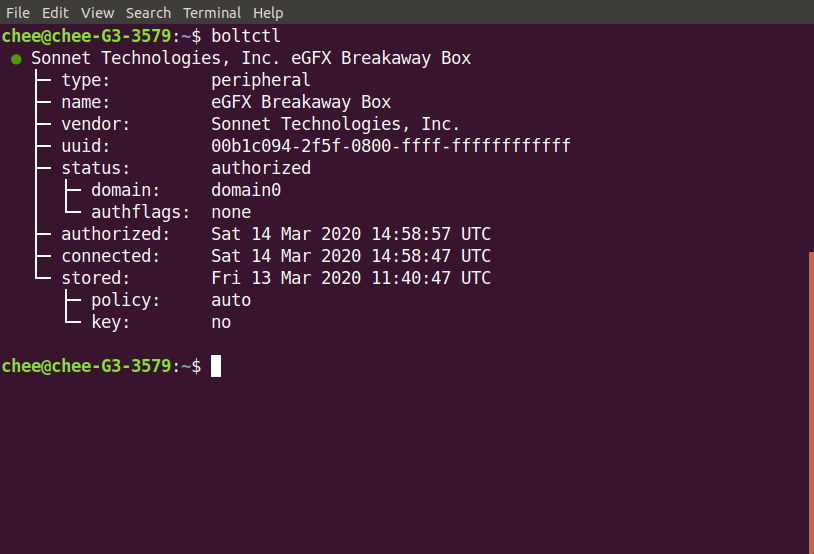
If there is an error with the authorization or the device is not recognized, you might have to switch off thunderbolt security under BIOS or run the following command:
1
sudo sh -c 'echo 1 > /sys/bus/thunderbolt/devices/0-0/authorized'
Update the above based on your device details.
- Update the
/etc/default/grubfile to include “nvidia.modset=1” at the end of the “GRUB_CMDLINE_LINUX” like so:
1
GRUB_CMDLINE_LINUX_DEFAULT="quiet splash nvidia.modeset=1"
Run sudo update-grub and reboot.
- Create a X11 config file in
/etc/X11/with the following for the egpu only:
1
2
3
4
5
6
7
8
9
10
11
Section "Module"
    Load           "modesetting"
EndSection

Section "Device"
    Identifier     "Device0"
    Driver         "nvidia"
    BusID          "7:0:0"
    Option         "AllowEmptyInitialConfiguration"
    Option         "AllowExternalGpus" "True"
EndSection
Note that this config file is only needed by the egpu and should only reference the bus and device id of the egpu with the allow external gpus option set.
- Assuming we are using gnome desktop manager, we need to add the following to
/etc/X11/XWrapper.config:
1
2
needs_root_rights=yes
allowed_users=console
Run sudo dpkg_reconfigure xserver-xorg-legacy. Select the console users option to run as root when presented with the screen.
This is to allow gdm3 to load the device driver as root else you will encounter errors such as /usr/lib/gdm3/gdm-x-session[2866]: (EE) NVIDIA(GPU-1): Failed to initialize the NVIDIA GPU at PCI.
This does not apply if you are using other desktop managers such as lightdm.
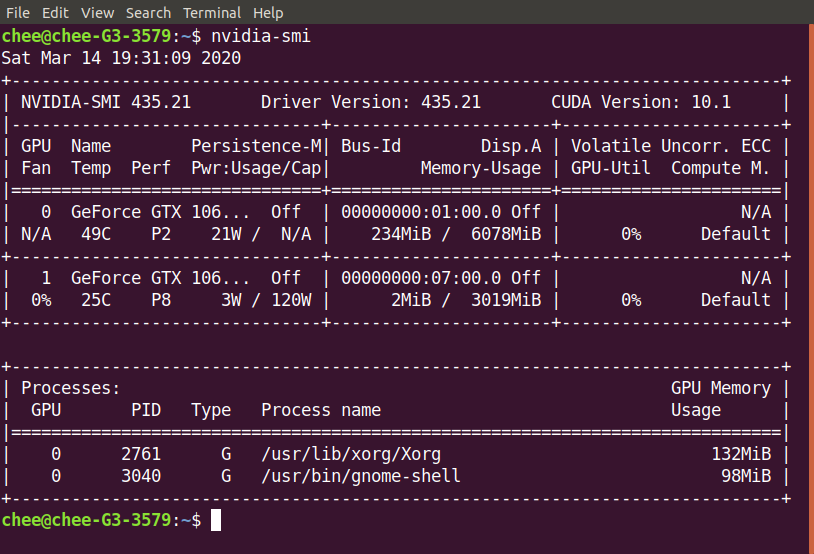
- Leave the egpu connected and reboot the system. If all goes well, you should be able to login through the desktop manager. Checking with
nvidia-smiyou should see the external egpu loaded and connected.
Caveats
Linux does not support hot-swapping of eGPU devices which means you need to deactivate the X11 config if you are not using the eGPU and reactivate it when you do.
I find the easiest way to do so is to wrap the above into a script which renames the config file when you want to use the eGPU and then reboot the system.
An example called activate_egpu.sh is as follows:
1
2
3
4
5
#!/bin/bash

echo "Activates EGPU script in /etc/X11/egpu.conf";
sudo prime-select nvidia
sudo mv /etc/X11/egpu.conf.backup /etc/X11/egpu.conf
Make sure you reboot the system with the eGPU plugged in still before the changes will take effect. Other articles reference logging in/out as the current user but it doesn’t work in my instance.
It is important to move/rename the egpu config file under /etc/X11 back else the system will display a black screen upon reboot.
Another script such as deactivate_egpu.sh can be used to do the reverse. Run the following script then disconnect/unplug the eGPU:
1
2
3
4
5
#!/bin/bash

echo "Deactivates EGPU script in /etc/X11/egpu.conf";
sudo prime-select nvidia;
sudo mv /etc/X11/egpu.conf /etc/X11/egpu.conf.backup
Reboot the system and it should return you to a single gpu desktop.
Another area which is not covered and outside the scope of this article is the use of external displays. One might have to re-run xrandr in order to setup the displays properly.
Following on this article, I hope to continue this thread with instructions on how to install cuda and tensorflow for machine learning development.
Happy Hacking!